
Hello Kitty is more than just a cartoon character; she’s a global icon that evokes feelings of warmth, nostalgia, and joy. Whether it’s her cute bow, innocent smile, or timeless charm, Hello Kitty has become a beloved figure in the hearts of children and adults alike. As a result, Hello Kitty cakes have become a popular choice for celebrating special occasions, particularly birthdays, baby showers, and other joyful gatherings. These cakes allow bakers to blend creativity and fun, making them not only delicious but visually captivating as well.
The beauty of a Hello Kitty cake lies in its versatility. From simple designs featuring the character’s signature face to more intricate creations with elaborate layers, fondant decorations, and 3D elements, the possibilities are endless. Whether you’re hosting a small gathering or a large event, a Hello Kitty cake is the perfect way to add an extra layer of charm and whimsy to any celebration. It’s a cake that instantly draws smiles and makes the occasion feel even more special.
In this post, we will share 10 creative Hello Kitty cake ideas that cater to different themes and skill levels. Whether you’re an experienced baker or just starting out, you’ll find inspiration to craft the perfect Hello Kitty cake for your next celebration. With these ideas, you can create a show-stopping dessert that will leave your guests talking long after the last slice is gone!
Adorable Hello Kitty Cake Designs for Birthdays
For more birthday cake inspiration, check out this collection of cake ideas to make your celebration extra special!
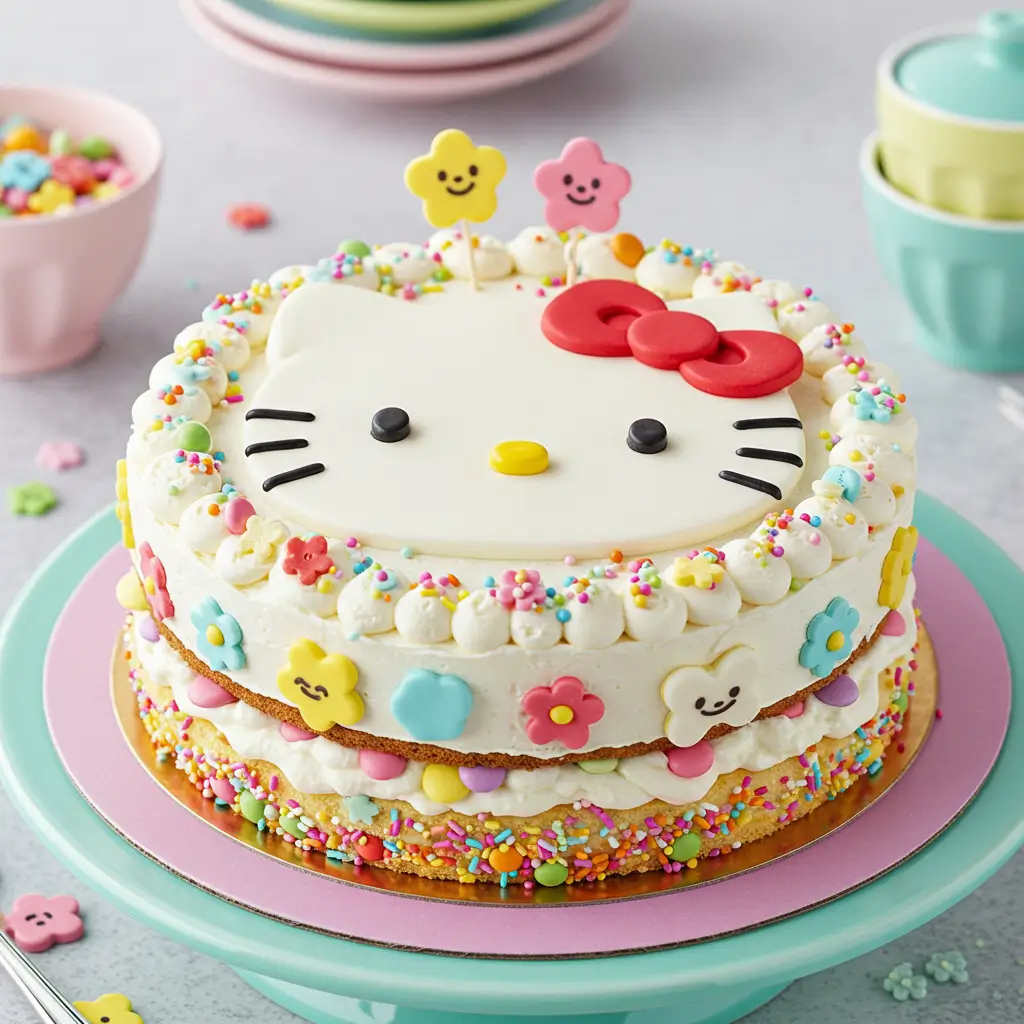
Simple Fondant Hello Kitty Cake
Why Choose a Fondant Cake?
Fondant cakes are perfect for creating a sleek and polished look, making them an excellent choice for a Hello Kitty design. The smooth surface of fondant allows for intricate details and bold decorations that are difficult to achieve with other types of frosting. Plus, fondant is incredibly versatile, allowing you to customize colors, shapes, and textures to match your theme.
Tools and Materials Needed
- Fondant Colors: White, pink, red, black, and yellow for Hello Kitty’s classic design.
- Rolling Pin: For smoothing and shaping the fondant.
- Cutting Tools: Small knives and fondant cutters for precise detailing.
- Edible Adhesive: To attach fondant pieces securely to the cake.
- Cake Leveler: Ensures a smooth and even base for your fondant layers.
- Molds and Stencils: Optional tools to add decorative accents like bows or flowers.
Step-by-Step Guide to Crafting the Cake
- Prepare the Base: Start with a well-leveled cake covered in a layer of buttercream frosting. The buttercream acts as an adhesive for the fondant and creates a smooth surface for application.
- Roll Out the Fondant: Use a rolling pin to evenly spread white fondant to cover the entire cake. Carefully drape it over the cake and smooth it out using fondant paddles.
- Create Hello Kitty’s Features:
- Cut out an oval shape from white fondant for the face.
- Add pink fondant for the bow, shaping it into two loops and a center knot.
- Use black fondant for the eyes and whiskers, and yellow for the nose.
- Assemble these details on the cake with edible adhesive.
- Decorate the Edges: Use pink or red fondant to add accents around the cake’s base, such as a ribbon or polka dots.
Pro Tips for a Perfect Finish
- Dust your workspace with cornstarch to prevent the fondant from sticking.
- Use a fondant smoother to eliminate air bubbles and wrinkles.
- Work quickly but carefully to prevent the fondant from drying out.
- Add edible glitter or pearls for an extra touch of elegance.
Variations to Try
- Two-Tiered Fondant Cake: Create a more elaborate design by stacking multiple tiers and decorating each with unique Hello Kitty elements.
- Themed Additions: Incorporate complementary elements like stars, hearts, or flowers around the cake to enhance the design.
- Flavored Fondant: Experiment with flavored fondant like vanilla or chocolate for an added layer of taste.
Why It’s a Hit at Parties
A simple fondant Hello Kitty cake not only looks stunning but also serves as a centerpiece for any celebration. Its clean, professional finish impresses guests and delights Hello Kitty fans of all ages.
3D Hello Kitty Shaped Cake
Why a 3D Cake Stands Out
A 3D Hello Kitty cake brings the iconic character to life, making it the ultimate showstopper for any celebration. Unlike flat, decorated cakes, a 3D cake creates a dynamic and realistic centerpiece that wows guests. This design is ideal for Hello Kitty enthusiasts, creating a memorable experience and offering the perfect opportunity for Instagram-worthy photos.
Tools and Materials Needed
- Specialty Cake Pans: Use dome or sphere-shaped pans to form Hello Kitty’s head.
- Cake Dowels: Essential for supporting the structure and ensuring stability.
- Serrated Knife: For carving and shaping the cake into precise dimensions.
- Edible Decorations: Fondant, food coloring, or modeling chocolate for details like the bow, nose, and whiskers.
- Piping Bags and Tips: For adding frosting details and textures.
- Cake Board or Stand: Provides a sturdy base for your 3D creation.
Step-by-Step Guide to Creating a 3D Hello Kitty Cake
- Bake the Cake Layers:
- Use a dome or spherical cake pan to bake the main body of Hello Kitty’s head.
- Bake additional smaller layers for ears or other parts of the design.
- Ensure the cakes are completely cooled before assembly to prevent crumbling.
- Carve and Assemble the Cake:
- Use a serrated knife to shape the dome into a smooth, round head.
- Attach smaller cake pieces for the ears using buttercream or edible glue.
- Insert cake dowels to provide structural support, especially if you’re making a larger cake.
- Cover with Fondant or Frosting:
- Apply a thin crumb coat of buttercream frosting to seal the cake and create a smooth surface.
- Roll out white fondant and drape it over the entire cake, smoothing it down to emphasize the 3D shape.
- Add Hello Kitty’s Features:
- Use black fondant or modeling chocolate for the eyes and whiskers.
- Shape the bow from pink or red fondant, adding small details like creases for realism.
- Roll out yellow fondant for the nose and attach it to the center of the face.
- Create Final Touches:
- Add edible glitter, sprinkles, or small fondant flowers around the base for a playful, decorative touch.
- Place the cake on a themed cake board or stand for a polished presentation.
Tips for Success
- Freeze the cake layers slightly before carving to make shaping easier and prevent breakage.
- Use food-safe brushes to add shading or highlights to the fondant for a more realistic look.
- Ensure the cake is kept at a cool temperature to maintain its structure during assembly and display.
- Practice assembling a mock version of the cake if you’re new to 3D designs.
Variations and Customizations
- Miniature 3D Hello Kitty Cakes: Create smaller, individual 3D cakes for party favors.
- Themed Additions: Dress Hello Kitty in a party hat, princess crown, or holiday-themed outfit to match the occasion.
- Flavored Layers: Use alternating cake flavors like vanilla and chocolate for a delicious surprise when sliced.
Why 3D Hello Kitty Cakes Are Worth the Effort
The effort put into creating a 3D Hello Kitty cake is rewarded with delighted reactions from guests. This cake serves as a centerpiece that captures attention and admiration, leaving a lasting impression on the party. Perfect for birthdays, themed events, or any celebration where Hello Kitty is the star, a 3D cake adds a touch of magic and creativity to the occasion.
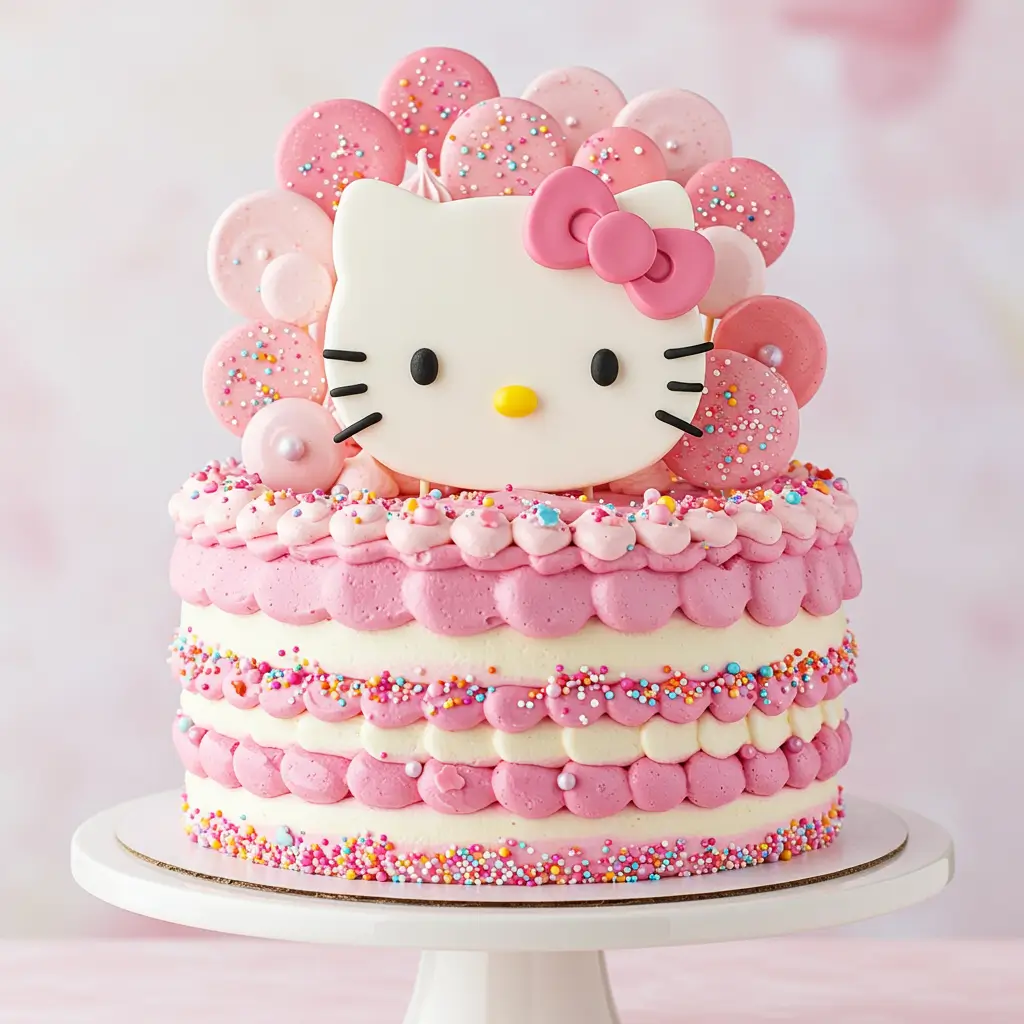
Pink and White Birthday Cake with Kitty Toppers
Why Pink and White Are Perfect for a Hello Kitty Cake
The combination of pink and white is synonymous with Hello Kitty’s iconic aesthetic. These soft, cheerful colors evoke a sense of fun, playfulness, and charm—making them a classic choice for a birthday cake. Whether the cake is for a child’s birthday or a Hello Kitty-themed event, the pink and white palette ensures the design is instantly recognizable and visually appealing.
Key Features of a Pink and White Hello Kitty Cake
- Layered Elegance: Pink and white layers create a visually striking and sophisticated look.
- Thematic Consistency: Hello Kitty toppers tie the design together and emphasize the theme.
- Customization Options: From pastel hues to vibrant tones, you can personalize the pink and white color scheme to match your event.
Ingredients and Supplies Needed
- Cake Layers: Vanilla, strawberry, or red velvet for a complementary color when sliced.
- Buttercream or Fondant: In shades of pink and white for frosting and decorations.
- Hello Kitty Toppers: Edible or non-edible toppers featuring Hello Kitty in various poses or styles.
- Decorative Accents: Sprinkles, edible pearls, or sugar flowers in pink and white.
- Piping Tools: For intricate frosting designs, borders, and details.
How to Make a Stunning Pink and White Cake
- Bake the Cake Layers:
- Prepare three or more layers of cake in your chosen flavor.
- Consider alternating pink-tinted and plain white layers for a striking look when cut.
- Frost the Cake:
- Crumb-coat the entire cake with a thin layer of white buttercream.
- Use pink buttercream to frost alternating layers or create an ombré effect from white to pink.
- Add Decorative Details:
- Pipe frosting rosettes, swirls, or ruffles in pink and white along the sides and top of the cake.
- Use edible glitter or metallic accents to add sparkle.
- Place the Hello Kitty Toppers:
- Position Hello Kitty toppers on the cake’s surface or at the base for added dimension.
- Use edible toppers for a fully edible cake, or choose figurine toppers as keepsakes.
- Finishing Touches:
- Add a “Happy Birthday” plaque or name lettering in matching colors.
- Surround the cake with additional decorative elements like sugar hearts or stars.
Creative Variations
- Pink and White Drip Cake: Add a white chocolate or strawberry ganache drip for a modern look.
- Multi-Tiered Option: Create a two- or three-tiered cake with alternating pink and white designs for larger gatherings.
- Character Integration: Incorporate other Hello Kitty-themed elements like bows, stars, or flowers into the design.
Tips for Perfect Execution
- Choose high-quality food coloring to achieve vibrant and consistent shades of pink and white.
- Use a turntable for smooth frosting application and easy decorating.
- Secure heavy toppers with toothpicks or edible glue to prevent them from shifting.
- Store the cake in a cool place to maintain the frosting and decorations.
Why Pink and White Cakes Are a Birthday Favorite
The pink and white design is timeless and versatile, offering a beautiful backdrop for Hello Kitty-themed decorations. It captures the celebratory spirit of a birthday while appealing to fans of the beloved character. With its stunning presentation and endless customization options, a pink and white Hello Kitty cake is sure to delight guests and create unforgettable memories.
Rainbow-Themed Hello Kitty Cake
Why a Rainbow Theme Works Perfectly with Hello Kitty
A rainbow-themed Hello Kitty cake is a show-stopping design that combines the joy of vibrant colors with the charm of Hello Kitty. This concept captures a playful and cheerful vibe, perfect for birthdays, baby showers, or celebrations where whimsy and creativity take center stage. The rainbow theme allows you to showcase Hello Kitty in a dynamic and magical setting, making the cake both visually stunning and fun.
Key Features of a Rainbow Hello Kitty Cake
- Vibrant Color Palette: Incorporates all the colors of the rainbow for an eye-catching effect.
- Hello Kitty Centerpiece: A figurine, topper, or fondant Hello Kitty becomes the star of the design.
- Textural Variety: Use frosting, fondant, and edible decorations to add dimension.
Ingredients and Supplies Needed
- Cake Layers: Prepare multiple layers in the colors of the rainbow (red, orange, yellow, green, blue, and purple).
- Frosting: Vanilla buttercream for crumb coating and rainbow-colored frosting for decorating.
- Decorative Accents: Edible glitter, rainbow sprinkles, and cloud-like sugar meringues.
- Hello Kitty Topper: A large centerpiece topper or multiple smaller edible Hello Kitty decorations.
- Piping Bags and Tips: For precise application of frosting and details.
How to Make a Rainbow-Themed Hello Kitty Cake
- Create the Rainbow Layers:
- Divide cake batter into six portions and dye each one with a different color using gel food coloring.
- Bake each layer separately for even coloring and consistent baking.
- Stack and Crumb Coat:
- Layer the cakes in rainbow order, starting with red and ending with purple.
- Apply a thin crumb coat of vanilla buttercream to lock in crumbs and smooth the surface.
- Frost the Cake:
- Cover the entire cake in white buttercream or fondant for a clean base.
- Add a rainbow buttercream border around the base or top edges for a cohesive look.
- Decorate with Rainbow and Hello Kitty Elements:
- Pipe rainbow-colored rosettes, swirls, or stripes around the cake.
- Use fondant or frosting to create rainbow arcs and fluffy white clouds.
- Position Hello Kitty at the center of the cake or as part of a whimsical scene atop the rainbow.
- Add Final Touches:
- Incorporate edible glitter for a magical sparkle.
- Sprinkle rainbow-colored confetti or edible pearls around the base for extra detail.
Creative Variations
- Watercolor Rainbow Effect: Blend frosting colors together for a soft, painted rainbow look.
- Drip Cake Option: Add a white chocolate drip with rainbow sprinkles cascading down the sides.
- Tiered Rainbow Cake: Create a multi-tiered design with Hello Kitty on the topmost layer and rainbow details cascading down.
Tips for Making the Perfect Rainbow Cake
- Use gel food coloring for vibrant colors that won’t alter the texture of the batter.
- Ensure even baking by using equal amounts of batter for each layer.
- Chill the cake before crumb coating to make stacking and frosting easier.
- Experiment with different Hello Kitty poses or outfits to match the rainbow theme.
Why Rainbow Hello Kitty Cakes Are a Crowd-Pleaser
The rainbow theme brings a sense of wonder and excitement to the cake, making it ideal for celebrations filled with laughter and joy. Combined with the timeless appeal of Hello Kitty, this cake design delivers on both style and taste. It’s a fantastic option for anyone looking to make their event colorful, cheerful, and unforgettable.
Creative Hello Kitty Cake Ideas for Baby Showers
Pastel-Themed Hello Kitty Cake
Why a Pastel Theme Complements Hello Kitty
A pastel-themed Hello Kitty cake exudes elegance, softness, and charm, making it a versatile choice for celebrations like baby showers, first birthdays, or tea parties. Pastel shades harmonize beautifully with Hello Kitty’s signature bow and gentle persona, creating a design that is both soothing and enchanting. This style is perfect for those who prefer subtle, muted tones over bold, vibrant colors.
Key Features of a Pastel Hello Kitty Cake
- Soft Color Palette: Includes pastel pinks, blues, yellows, purples, and greens.
- Delicate Details: Incorporates floral patterns, soft textures, and gentle embellishments.
- Hello Kitty Highlight: Features Hello Kitty as a centerpiece, often adorned with a pastel bow or floral crown.
Ingredients and Supplies Needed
- Cake Layers: Vanilla or almond-flavored layers, dyed in pastel shades.
- Buttercream Frosting: Lightly tinted in pastel colors for icing and decoration.
- Fondant Decorations: Soft-colored bows, flowers, and Hello Kitty-shaped accents.
- Edible Pearls and Glitter: For a touch of sophistication.
- Hello Kitty Topper: Either edible or a reusable keepsake figurine.
How to Make a Pastel-Themed Hello Kitty Cake
- Bake the Cake Layers:
- Prepare cake batter and divide it into portions for each pastel shade.
- Use gel food coloring to achieve soft hues, ensuring a consistent pastel tone across all layers.
- Prepare the Frosting:
- Whip buttercream frosting and separate it into batches to match the pastel color scheme.
- Tint each batch with a few drops of gel food coloring, keeping the shades light and airy.
- Stack and Frost the Cake:
- Alternate pastel-colored layers for a visually stunning cross-section.
- Apply a thin crumb coat to lock in crumbs, followed by a smooth final layer of frosting in a single pastel shade or an ombré effect.
- Decorate with Pastel Accents:
- Add fondant flowers, bows, or stars in soft colors around the cake.
- Pipe delicate borders, swirls, or rosettes using pastel buttercream.
- Place Hello Kitty as the focal point, perhaps holding a bouquet of pastel flowers or sitting in a garden-like setting.
- Finish with Elegant Touches:
- Sprinkle edible pearls, pastel confetti, or shimmer dust for a polished look.
- Add a satin ribbon around the base of the cake for added sophistication.
Creative Variations
- Pastel Watercolor Effect: Blend soft frosting colors on the cake for a dreamy, watercolor-like appearance.
- Floral Pastel Cake: Incorporate hand-piped or fondant flowers in pastel hues to create a garden-inspired design.
- Tiered Elegance: Make a multi-tiered pastel cake with each tier showcasing a different shade or decoration style.
Tips for Perfecting a Pastel-Themed Cake
- Use white-based frosting to ensure true pastel tones.
- Keep the pastel theme consistent by matching all decorations and toppers.
- Opt for subtle designs that enhance, rather than overpower, the overall softness of the cake.
- Balance the colors with neutral elements like white or cream to maintain the pastel aesthetic.
Why Pastel-Themed Hello Kitty Cakes Stand Out
The pastel theme adds a layer of sophistication and timeless appeal to the Hello Kitty design, making it ideal for events where elegance is key. Its gentle color scheme and intricate details create a cake that is not only visually appealing but also memorable for any occasion. Whether it’s a birthday, a christening, or an afternoon tea, this cake design is guaranteed to delight guests with its delicate charm and sweet personality.
Tiered Hello Kitty Cake with Baby Accents
Why a Tiered Hello Kitty Cake is Perfect for Special Occasions
A tiered Hello Kitty cake with baby accents is a beautiful centerpiece for events like baby showers, first birthdays, or christenings. The multi-tiered design allows for greater creativity and sophistication, making it a show-stopping dessert. Baby-themed elements, combined with the adorable Hello Kitty character, create a heartwarming and celebratory feel, ideal for welcoming a new addition or celebrating milestones.
Key Features of a Tiered Hello Kitty Cake with Baby Accents
- Elegant Tiers: Each tier can showcase a unique design or theme while maintaining harmony.
- Baby-Themed Details: Includes elements like baby booties, pacifiers, tiny bottles, or blocks.
- Hello Kitty as a Star: Features Hello Kitty holding a baby item, sitting atop the cake, or integrated into the design with baby accents.
Ingredients and Supplies Needed
- Cake Layers: Choose flavors that suit the occasion, such as vanilla, strawberry, or lemon.
- Buttercream or Fondant: For a polished finish and decorations.
- Baby Accents: Fondant or edible baby booties, rattles, or pastel-colored blocks.
- Hello Kitty Topper: Either a handcrafted fondant piece or a figurine holding baby accessories.
- Edible Glitter and Pearls: To add a touch of glamour.
How to Make a Tiered Hello Kitty Cake with Baby Accents
- Plan the Design:
- Decide on the number of tiers and themes for each tier.
- Example: A pastel-themed bottom tier with baby blocks, a polka-dot middle tier, and Hello Kitty on the top tier.
- Bake the Cake Layers:
- Bake cake layers for each tier in desired sizes (e.g., 6-inch, 8-inch, and 10-inch).
- Level and stack the layers for stability.
- Prepare and Assemble the Tiers:
- Use dowels or cake boards to ensure the tiers are stable.
- Apply a crumb coat to each tier before adding the final layer of buttercream or fondant.
- Decorate the Tiers:
- Bottom Tier: Add baby blocks with letters, pastel stripes, or a quilted pattern.
- Middle Tier: Decorate with polka dots, baby rattles, or floral designs.
- Top Tier: Highlight Hello Kitty holding a baby blanket, surrounded by fondant stars or clouds.
- Add Final Touches:
- Use edible pearls, shimmer dust, or tiny bows for a sophisticated look.
- Place a ribbon around the base of each tier for added elegance.
Creative Variations
- Gender-Themed Cake: Incorporate baby blue or pastel pink shades to reflect the baby’s gender.
- Baby Shower Cake: Add edible phrases like “Welcome Baby” or “It’s a Boy!” alongside the Hello Kitty design.
- Interactive Cake: Include pull-apart cupcakes around the base to engage guests.
Tips for Creating a Stunning Tiered Cake
- Ensure each tier is balanced and structurally supported to prevent sagging.
- Use complementary colors and patterns for a cohesive design.
- Choose lightweight decorations for the top tier to maintain stability.
- Practice clean edges and smooth finishes, especially with fondant.
Why This Design Stands Out
The tiered structure adds grandeur to the cake, while baby accents and Hello Kitty create an emotional connection. This combination of elegance and cuteness makes it a versatile and memorable dessert for family-oriented celebrations. The attention to detail and personalization elevate the design, leaving a lasting impression on guests and ensuring the cake becomes the highlight of the event.
Floral Hello Kitty Cake Design
The Beauty of Combining Florals and Hello Kitty
A floral Hello Kitty cake design blends the timeless charm of Hello Kitty with the elegance of flowers. This design is perfect for occasions like birthdays, baby showers, or even garden parties. The flowers bring a touch of sophistication, while Hello Kitty adds playfulness, making it a universally appealing choice for both children and adults.
Key Features of a Floral Hello Kitty Cake
- Floral Elegance: Decorated with intricate flowers made from fondant, buttercream, or edible prints.
- Hello Kitty Centerpiece: Features Hello Kitty nestled among the flowers or as a bold centerpiece.
- Customizable Color Palette: Soft pastels or bold, vibrant colors to match the event theme.
Ingredients and Supplies Needed
- Cake Layers: Choose any flavor, such as vanilla, chocolate, or lemon, to complement the floral theme.
- Buttercream or Fondant: Used for smooth finishes and flower decorations.
- Edible Flowers: Crafted from sugar or fondant for a realistic look.
- Hello Kitty Topper: A 3D fondant figure or printed image.
- Piping Tips: For creating intricate buttercream flowers like roses, daisies, or peonies.
How to Create a Floral Hello Kitty Cake Design
- Plan the Cake Design:
- Decide on the placement of flowers and the Hello Kitty figure.
- Example: Arrange flowers cascading down the side of the cake with Hello Kitty seated at the top.
- Bake and Prepare the Cake:
- Bake the desired number of layers and level them for a stable base.
- Apply a crumb coat and chill before adding the final layer of buttercream or fondant.
- Create Floral Decorations:
- Fondant Flowers: Roll and cut fondant into shapes like roses, daisies, or orchids. Allow them to set before placing on the cake.
- Buttercream Flowers: Use piping tips to create intricate designs directly on the cake or on parchment paper for easy application.
- Edible Prints: Use pre-designed floral prints to save time while maintaining a polished look.
- Assemble the Cake:
- Cover the cake in a smooth layer of buttercream or fondant.
- Add flowers in a cascading or scattered arrangement.
- Position Hello Kitty:
- Place a Hello Kitty figure or topper prominently on the cake, such as sitting among the flowers or holding a bouquet.
- Add Final Touches:
- Incorporate edible pearls, glitter, or gold leaf for a luxurious touch.
- Use a color palette that ties the flowers and Hello Kitty design together seamlessly.
Creative Variations
- Seasonal Themes: Use seasonal flowers like poinsettias for Christmas or sunflowers for summer.
- Monochrome Elegance: Choose a single color palette, such as all pink or all white, for a sophisticated look.
- Personalized Details: Add the recipient’s name or age among the flowers to make the cake more special.
Tips for a Stunning Floral Design
- Opt for realistic colors and textures when creating flowers for a more professional finish.
- Mix large statement flowers with smaller filler blooms for a balanced design.
- Ensure Hello Kitty stands out by placing her in a central position or contrasting color.
- Use florist wire or toothpicks to support larger fondant flowers if needed.
Why This Design is a Favorite
The Floral Hello Kitty cake design appeals to all ages, blending the whimsy of Hello Kitty with the timeless beauty of flowers. It’s versatile enough for casual and formal events, making it a popular choice for many celebrations. The combination of playful and elegant elements ensures this cake will be both visually stunning and a delightful treat for guests.
Gender Reveal Hello Kitty Cake
A Sweet Surprise with Hello Kitty
The Gender Reveal Hello Kitty Cake combines the universal appeal of Hello Kitty with the excitement of a gender reveal celebration. This design is perfect for parents looking to add a whimsical and personal touch to their special announcement. Featuring creative colors, surprise elements, and adorable decorations, this cake is sure to create a memorable moment for everyone.
Key Features of a Gender Reveal Hello Kitty Cake
- Surprise Inside: A hidden layer of pink or blue cake or candy inside to reveal the baby’s gender.
- Hello Kitty Decoration: Hello Kitty featured as a centerpiece, holding a balloon, sitting on a cloud, or peeking out with a playful expression.
- Dual Colors: Incorporating soft blues and pinks for a gender-neutral aesthetic until the big reveal.
Ingredients and Supplies Needed
- Cake Layers: Vanilla, funfetti, or chocolate layers dyed pink or blue for the reveal.
- Buttercream or Fondant: For a smooth finish and customizable decorations.
- Fillings: Candy, sprinkles, or cream filling in the reveal color.
- Hello Kitty Topper: A fondant or edible print topper.
- Piping Tools: For intricate details like borders, clouds, or balloons.
How to Create a Gender Reveal Hello Kitty Cake
- Plan the Design:
- Decide how the reveal will be presented: colored layers, a hidden candy core, or a “cut-to-reveal” design.
- Position Hello Kitty as part of the theme, perhaps with question marks, balloons, or other playful elements.
- Bake the Cake Layers:
- Prepare two or three cake layers in neutral colors on the outside.
- Dye one or more layers pink or blue using food coloring for the surprise inside.
- Assemble the Cake:
- Stack the layers with buttercream or ganache between them, ensuring the reveal layer remains hidden.
- For a candy-filled reveal, cut a hole in the center of the middle layer and fill it with colored candies before sealing with the top layer.
- Decorate the Cake:
- Cover the cake with a smooth layer of buttercream or fondant in pastel tones.
- Add Hello Kitty as a topper or piped design on the cake’s surface.
- Add Gender Reveal Elements:
- Incorporate question marks, balloons, or storks for a playful touch.
- Use edible glitter or pearl accents to elevate the design.
- Finishing Touches:
- Place neutral decorations like flowers, clouds, or stars around Hello Kitty to enhance the theme.
- Ensure the colors remain subtle and balanced until the big reveal.
Creative Variations
- Exploding Cake Reveal: Fill the cake with pink or blue sprinkles that spill out when sliced.
- Buttercream Surprise: Use a neutral outer layer of buttercream with an ombré pink or blue design hidden underneath.
- Dual-Themed Cake: Divide the cake into two halves, one pink and one blue, with Hello Kitty bridging the two sides.
Tips for a Perfect Gender Reveal Hello Kitty Cake
- Test the food coloring beforehand to ensure the reveal color is vibrant and distinct.
- Opt for surprise fillings that won’t affect the structural integrity of the cake, like small candies or sprinkles.
- Use neutral tones like white, gold, or silver to complement the blue and pink.
- Place Hello Kitty in a central or elevated position for maximum visibility.
Why This Cake is a Showstopper
The Gender Reveal Hello Kitty Cake is a delightful combination of suspense, joy, and creativity. It captures the anticipation of a gender reveal while incorporating the beloved charm of Hello Kitty. This cake not only adds sweetness to the celebration but also serves as a focal point for an unforgettable moment shared with family and friends.
DIY Hello Kitty Cake Designs for Home Bakers
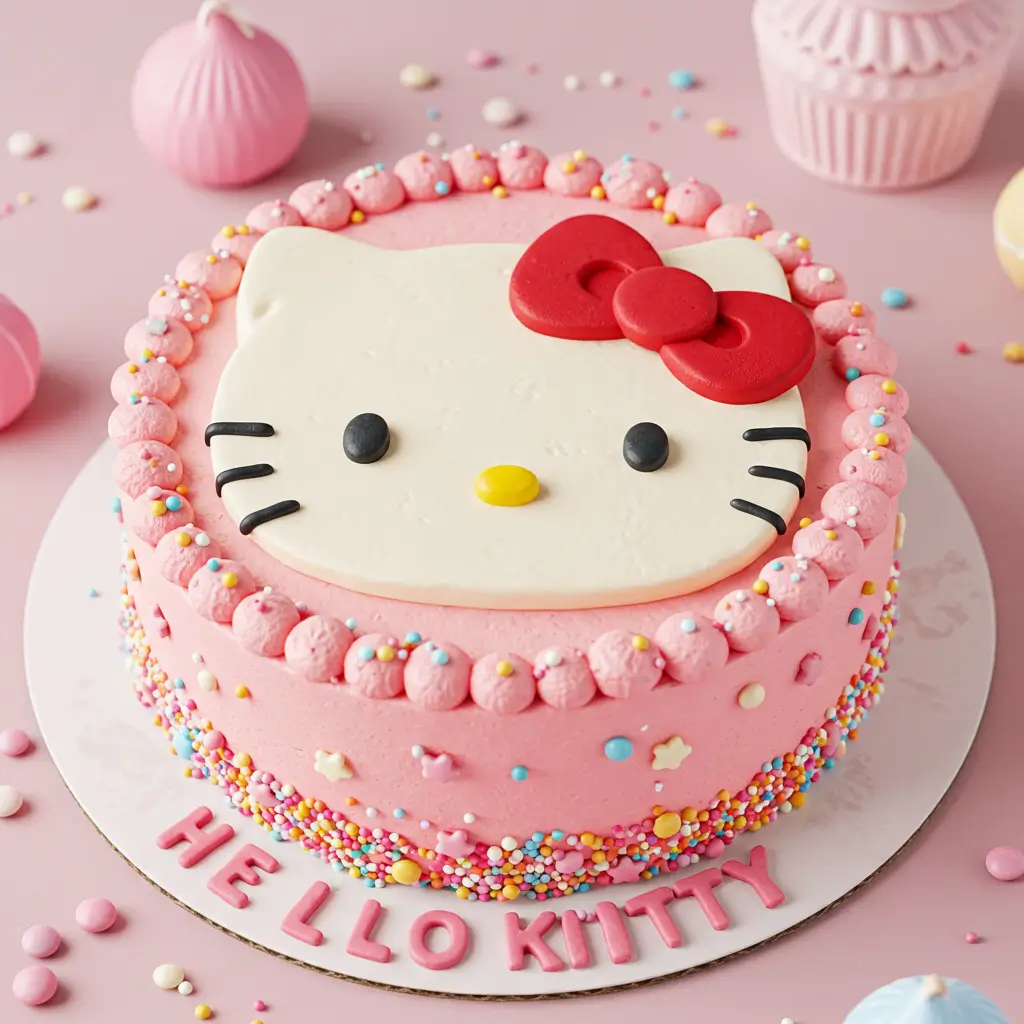
Quick and Easy Hello Kitty Cake
Effortless Charm for Hello Kitty Fans
The Quick and Easy Hello Kitty Cake is perfect for those who want to create a delightful dessert without spending hours in the kitchen. Designed for busy bakers or last-minute celebrations, this cake captures the essence of Hello Kitty’s charm with minimal effort and maximum impact. It’s an ideal choice for beginners or anyone short on time but still eager to make a statement.
Why Choose a Quick and Easy Design?
- Saves Time: Perfect for impromptu parties or when you’re juggling a packed schedule.
- Accessible for All Skill Levels: No need for advanced baking or decorating skills.
- Budget-Friendly: Uses readily available ingredients and tools.
Key Features of a Quick and Easy Hello Kitty Cake
- Pre-Made Elements: Store-bought cake mix or pre-baked cake layers.
- Simple Decorations: Focus on basic designs, such as piped buttercream or edible Hello Kitty toppers.
- Time-Saving Techniques: Minimal baking and decorating steps without sacrificing the wow factor.
Ingredients and Tools You’ll Need
- Cake Base: Use a store-bought mix or ready-made sponge cake.
- Frosting: Whipped cream or pre-made buttercream for easy application.
- Decorations: Edible Hello Kitty stickers, candy eyes, or a fondant topper.
- Tools: Offset spatula, piping bags, and cookie cutters for quick shaping.
Step-by-Step Guide to Making a Quick and Easy Hello Kitty Cake
- Prepare the Cake Base:
- Use a store-bought cake mix to bake your cake layers or purchase pre-baked sponge cakes.
- Opt for a single-layer design or stack two layers for a bit of height.
- Frost the Cake:
- Apply a thin crumb coat of frosting to seal in the crumbs.
- Spread a smooth layer of frosting over the cake, focusing on a simple and clean finish.
- Add Hello Kitty Details:
- Use an edible Hello Kitty image or pre-made topper to place directly on the cake.
- Create Hello Kitty’s face using candy pieces for the eyes, a jellybean for the nose, and licorice strips for the whiskers.
- Personalize the Design:
- Add a pink bow using pre-colored fondant or a candy bow topper.
- Sprinkle colored sugar or edible glitter around the edges for a playful touch.
- Finishing Touches:
- Pipe a simple border around the cake using a piping bag.
- Write a message like “Happy Birthday!” with a gel icing pen.
Creative Variations for a Quick and Easy Hello Kitty Cake
- Cupcake Display: Use cupcakes instead of a full-sized cake, each decorated with Hello Kitty-themed toppers.
- Sheet Cake Simplicity: Make a rectangular sheet cake with Hello Kitty’s face outlined in frosting or sprinkles.
- Candy Kit Add-Ons: Use pre-packaged Hello Kitty decorating kits for quick assembly.
Tips for Success
- Keep it simple—focus on a few standout elements to create the Hello Kitty theme.
- If you’re short on time, skip intricate piping and rely on pre-made decorations.
- Chill the cake before decorating to make applying frosting easier and cleaner.
Why This Cake is a Hit
The Quick and Easy Hello Kitty Cake proves that you don’t need advanced skills or hours of effort to make a show-stopping dessert. With just a few simple steps and creative shortcuts, you can create a cake that brings smiles to fans of all ages. It’s a stress-free way to celebrate Hello Kitty and make any occasion special.
Cupcake Hello Kitty Cake
Bite-Sized Adorable Treats
The Cupcake Hello Kitty Cake is a fun and creative twist on the classic Hello Kitty cake design. This concept turns a traditional cake into a collection of individually decorated cupcakes that come together to form a complete Hello Kitty-themed display. Perfect for parties, these bite-sized treats are easy to serve, share, and customize, making them a crowd-pleaser for all ages.
Why Choose a Cupcake Hello Kitty Cake?
- Convenience: Individual portions make serving effortless.
- Variety: Each cupcake can feature a unique design or complement the overall Hello Kitty theme.
- Interactive Fun: Guests can pick their favorite cupcake, or kids can even help decorate.
Key Features of a Cupcake Hello Kitty Cake
- Flexible Arrangement: Arrange cupcakes in the shape of Hello Kitty’s face or a playful themed pattern.
- Individual Creativity: Each cupcake can showcase Hello Kitty’s iconic features or other themed elements.
- Portion Control: Guests can enjoy a single cupcake, reducing waste and simplifying cleanup.
Ingredients and Tools You’ll Need
- Cupcakes: Use vanilla or chocolate cupcakes as the base.
- Frosting: Buttercream, whipped cream, or fondant for decorating.
- Decorations: Mini fondant bows, candy eyes, licorice for whiskers, and colored sprinkles.
- Tools: Piping bags, small spatulas, and cookie cutters for shaping decorations.
Step-by-Step Guide to Making a Cupcake Hello Kitty Cake
- Bake Your Cupcakes:
- Prepare cupcakes using your favorite recipe or a store-bought mix.
- Use white cupcake liners to maintain a clean and elegant look.
- Plan the Layout:
- Arrange the cupcakes on a flat surface to form the shape of Hello Kitty’s face.
- Use smaller cupcakes for ears and place them strategically for accuracy.
- Frost the Cupcakes:
- Spread or pipe white frosting on each cupcake for Hello Kitty’s base color.
- Smooth the frosting for a cohesive look across all cupcakes.
- Add Hello Kitty Details:
- Use fondant or candy to create Hello Kitty’s signature features: eyes, nose, and whiskers.
- Place a pink or red fondant bow on one of the cupcakes to represent Hello Kitty’s iconic accessory.
- Finishing Touches:
- Sprinkle edible glitter or pastel-colored sugar around the edges for extra flair.
- Add a small message or additional themed decorations on surrounding cupcakes, such as hearts or stars.
Creative Variations for a Cupcake Hello Kitty Cake
- Colorful Base: Use tinted frosting in shades of pink, lavender, or yellow for a vibrant look.
- Themed Cupcake Liners: Choose Hello Kitty-themed liners to add an extra layer of detail.
- Interactive Station: Set up a cupcake decorating station where guests can add their own touches to the cupcakes.
Tips for Success
- Chill the cupcakes before arranging them to keep the frosting intact.
- Use a serving board or cake stand for easy transportation and a polished presentation.
- Create extra cupcakes for backup in case of decorating mishaps or to accommodate more guests.
Why This Cake is a Hit
The Cupcake Hello Kitty Cake combines the fun of individual treats with the charm of a cohesive themed design. It’s perfect for birthdays, casual gatherings, or any celebration where Hello Kitty fans are present. Not only is it visually delightful, but it also allows for a personalized experience that guests will remember fondly.
Hand-Drawn Hello Kitty Cake
A Personal Artistic Touch
The Hand-Drawn Hello Kitty Cake takes the beloved Hello Kitty character to new heights with an artistic, personalized design that’s sure to impress. This approach combines the fun of baking with the creativity of drawing, offering a unique and memorable centerpiece for any celebration. Whether you’re a seasoned baker or a beginner, this hand-drawn cake allows you to showcase your artistic skills and create something truly special.
Why Choose a Hand-Drawn Hello Kitty Cake?
- Customization: Drawing Hello Kitty by hand allows for a truly unique design that can be tailored to the event or the recipient. Whether you want a traditional look or something more whimsical, the design is fully customizable.
- Artistic Expression: If you love to draw or want to challenge yourself, a hand-drawn cake lets you express your creativity in a fun and edible way.
- Perfect for Fans: Fans of Hello Kitty will appreciate the level of detail and the fact that the cake is personalized with your artistic flair.
Key Features of a Hand-Drawn Hello Kitty Cake
- Detailed Design: Focus on Hello Kitty’s iconic face with expressive eyes, a cute bow, and playful whiskers, all created using edible markers or food coloring.
- Artistic Appeal: The hand-drawn nature of the design makes it more than just a cake – it’s an art piece that captures the essence of Hello Kitty’s charm.
- Customizable Elements: You can add additional decorations, such as hearts, stars, or even a themed message, to enhance the overall design.
Ingredients and Tools You’ll Need
- Cake Base: Bake a cake from scratch or use a pre-baked sponge cake as the foundation. A classic vanilla or chocolate cake will complement the design nicely.
- Frosting: Smooth buttercream or fondant will create a perfect blank canvas for drawing. Buttercream provides a soft, spreadable texture, while fondant offers a smooth, professional finish.
- Food Coloring or Edible Markers: Use food-safe markers or food coloring mixed with a bit of clear extract to create your drawing inks.
- Decorative Tools: Small piping bags with colored buttercream for any piping detail (such as the bow or whiskers), a toothpick for sketching the outline, and a fine-tipped brush for adding intricate details.
Step-by-Step Guide to Making a Hand-Drawn Hello Kitty Cake
- Prepare the Cake:
- Bake your cake layers and allow them to cool completely. Once cooled, level the layers to ensure they are even.
- Apply a thin crumb coat to seal in any loose crumbs and then cover the entire cake with a smooth layer of buttercream or fondant.
- Sketch the Design:
- Lightly sketch Hello Kitty’s face onto the cake using a toothpick or edible gel. Focus on getting the key elements in place: her eyes, nose, bow, and whiskers. This will serve as a guide for your hand-drawing.
- Draw Hello Kitty:
- Using edible markers or food coloring mixed with a clear extract, carefully trace the outline of Hello Kitty’s face and features. Take your time to ensure that the lines are neat and accurate, particularly around the eyes and whiskers.
- Add Decorative Elements:
- Once the face is outlined, you can add small details like the bow, additional facial features, or other themed decorations such as hearts or stars.
- Finishing Touches:
- If desired, pipe a border around the cake or write a personalized message such as “Happy Birthday!” using a piping bag and colored buttercream.
- For extra flair, sprinkle edible glitter or colored sugar on the edges of the cake to give it a festive touch.
Creative Variations for a Hand-Drawn Hello Kitty Cake
- Colored Background: Instead of a plain white background, use pastel-colored buttercream or fondant to make Hello Kitty pop, adding an extra layer of visual appeal.
- Themed Borders: Create a thematic border around the cake with edible flowers, hearts, or even Hello Kitty’s signature items like her purse or bow.
- 3D Accents: Add 3D elements like fondant bows, hearts, or flowers to give the design more depth and dimension.
Tips for Success
- Take Your Time: Hand-drawing can be intricate, so give yourself time to sketch and draw the design. The more patience you have, the better the final result will be.
- Chill the Cake: If you’re using buttercream, refrigerate the cake before drawing to help the frosting firm up and provide a smooth surface.
- Practice First: If you’re not confident in your drawing skills, practice on a piece of parchment paper before attempting to draw directly on the cake.
- Use a Steady Hand: When drawing intricate features like eyes or whiskers, make sure to go slowly and steadily to maintain the clean lines.
Why This Cake is a Hit
The Hand-Drawn Hello Kitty Cake is perfect for those who want to take their baking to the next level by incorporating artistry into their designs. It combines the fun of Hello Kitty with the creativity of hand-drawing, making it a memorable treat for both kids and adults. Whether it’s for a birthday, a special event, or simply to showcase your skills, this cake will surely stand out and leave a lasting impression. It’s a delightful way to celebrate Hello Kitty and your own artistic talent!
Chocolate Hello Kitty Cake
Indulge in Delicious Decadence
The Chocolate Hello Kitty Cake combines the rich, irresistible flavor of chocolate with the playful charm of Hello Kitty. Perfect for chocolate lovers and fans of the iconic character, this cake offers a moist, flavorful base paired with creative and fun decorations. Whether it’s for a birthday party, a special event, or just because, this cake is sure to delight anyone with a sweet tooth and a love for Hello Kitty.
Why Choose a Chocolate Hello Kitty Cake?
- Chocolate Lovers’ Dream: If you’re a fan of rich, moist chocolate cake, this version of the Hello Kitty cake will satisfy your cravings while delivering a delightful aesthetic.
- Appealing to All Ages: Hello Kitty’s timeless charm paired with the deep, comforting taste of chocolate makes it a hit with both kids and adults.
- Versatile for Any Occasion: Whether it’s a birthday, a casual gathering, or a themed event, this cake works perfectly as the centerpiece.
Key Features of a Chocolate Hello Kitty Cake
- Moist Chocolate Cake: A rich and decadent chocolate cake forms the perfect base, providing a balanced sweetness that pairs wonderfully with the decorations.
- Simple or Intricate Design: The Hello Kitty theme can be applied in a variety of ways, from simple piped frosting to more elaborate fondant creations, depending on your skill level.
- Customizable Decorations: From a traditional Hello Kitty face to themed additions like chocolate bows, the cake offers plenty of room for creativity.
Ingredients and Tools You’ll Need
- Chocolate Cake Base: Use a favorite chocolate cake recipe or opt for a pre-made mix. Make sure the cake is moist and rich, providing a delicious base for the decorations.
- Frosting: Choose between buttercream, ganache, or fondant for the cake’s exterior. A rich chocolate ganache would be the perfect complement to a chocolate cake base.
- Decorations: Edible Hello Kitty toppers, colored fondant for the bow and facial features, and candy eyes. You can also use chocolate decorations like shavings or truffles to enhance the look.
- Tools: Offset spatula for frosting, piping bags for detailing, cookie cutters for shaping the bow, and a fondant rolling pin for precise decorations.
Step-by-Step Guide to Making a Chocolate Hello Kitty Cake
- Prepare the Cake: Begin by baking your chocolate cake according to the recipe or instructions on the mix. Allow the cakes to cool completely before handling. If you want to stack layers, level the cakes with a serrated knife to ensure they sit flat and even.
- Frost the Cake: Apply a crumb coat of frosting (a thin layer to seal in crumbs) and refrigerate the cake for 30 minutes. This helps create a smooth surface for decorating. Spread a thick layer of chocolate frosting or ganache over the cake. Use a spatula to smooth the frosting evenly across the top and sides.
- Add Hello Kitty’s Features: Using fondant or colored buttercream, create Hello Kitty’s iconic features: her eyes, nose, whiskers, and bow. Shape the bow using red or pink fondant and place it on one side of the cake to resemble Hello Kitty’s signature style. For the facial features, pipe or cut out small circles for the eyes, a triangle or small circle for the nose, and delicate whiskers.
- Personalize the Design: Add further decoration like a fondant Hello Kitty face topper, or create your own version with fondant to match the overall theme. Sprinkle chocolate shavings around the edges or top the cake with small chocolate truffles to enhance the chocolate experience.
- Finishing Touches: Use piping bags to add small details, such as a piped border around the bottom of the cake or additional decorative accents on the sides. If desired, add edible glitter or small fondant hearts to further personalize the cake.
Creative Variations for a Chocolate Hello Kitty Cake
- Chocolate Drip Effect: Add a glossy chocolate ganache drip effect over the top of the cake for a modern twist on the classic design.
- Chocolate Decorations: Incorporate chocolate elements like shavings, curls, or even chocolate Hello Kitty figurines to bring out the flavor and add dimension.
- Themed Cupcakes: Instead of a full-sized cake, create Hello Kitty-themed chocolate cupcakes decorated with miniature fondant bows and faces.
Tips for Success
- Use Quality Chocolate: For the best taste and texture, opt for high-quality cocoa or chocolate in both your cake and frosting.
- Keep the Cake Chilled: Chocolate ganache or frosting can soften, so refrigerate the cake after decorating to set everything in place.
- Work in Layers: For a well-structured cake, consider using multiple layers and frosting between them. This will make it visually appealing when sliced.
- Practice the Design: If you’re new to hand-piping, practice the facial features and other details on parchment paper first to build confidence before applying them to the cake.
Why This Cake is a Hit
The Chocolate Hello Kitty Cake is a crowd-pleaser for all ages, offering the best of both worlds: the rich, indulgent flavor of chocolate and the charming, playful appeal of Hello Kitty. It’s perfect for birthdays, themed parties, or any occasion where you want to impress your guests with a delicious and visually stunning cake. The combination of chocolate and Hello Kitty’s beloved features makes it a unique treat that will leave everyone craving more.
Unique Hello Kitty Cake Ideas for Special Celebrations
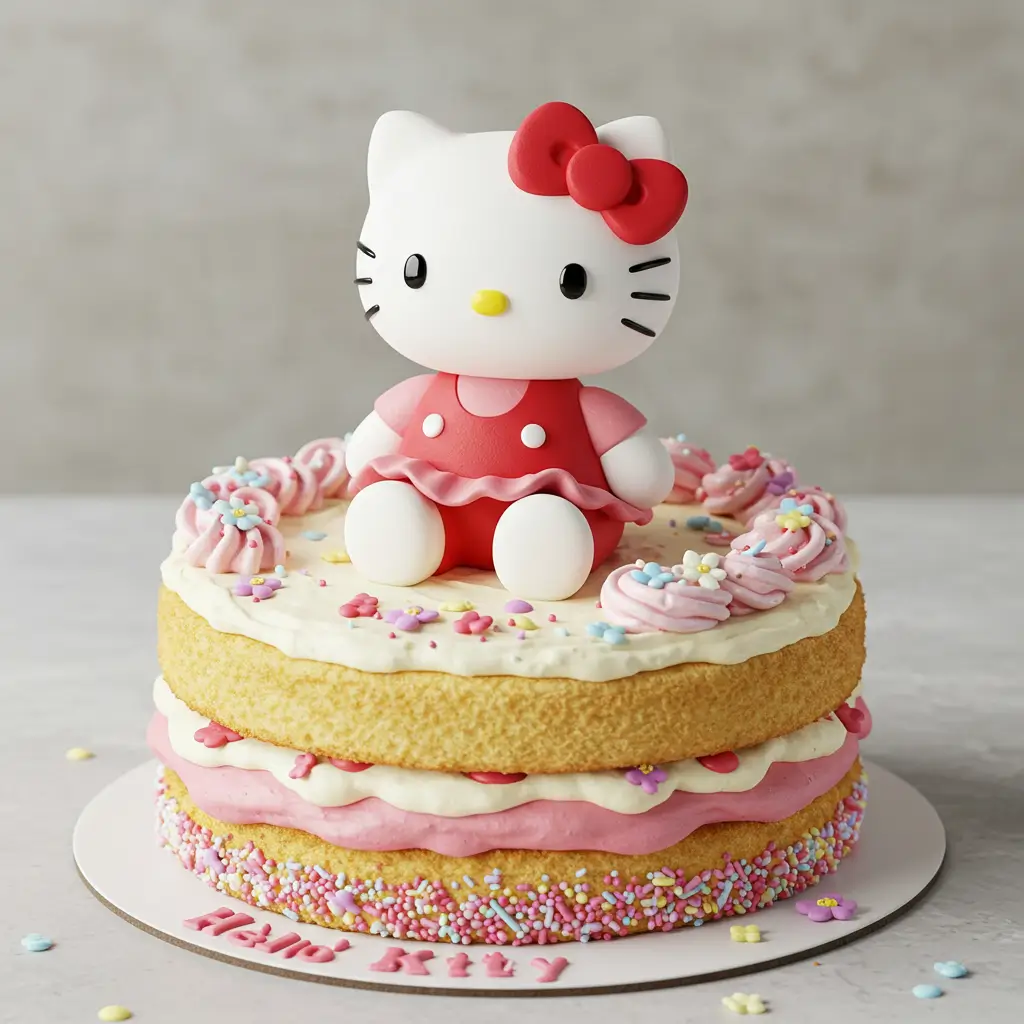
Two-Layer Hello Kitty Cake
Double the Fun, Double the Flavor
The Two-Layer Hello Kitty Cake elevates the classic Hello Kitty design with an added level of creativity and indulgence. This cake consists of two moist, fluffy layers of cake stacked together, offering a perfect balance of flavor and decoration. Whether you’re celebrating a birthday, an anniversary, or a special event, this two-layer design adds visual depth and delicious texture, making it a standout centerpiece for any occasion.
Why Choose a Two-Layer Hello Kitty Cake?
- Impressive Appearance: The two layers provide a more substantial and visually impressive cake that will wow your guests with its height and detailed decorations.
- Perfect for Larger Gatherings: A two-layer cake ensures there’s enough to serve more guests, making it ideal for parties or events with multiple people.
- Versatile Design: You can customize the layers to match different flavors or color schemes, allowing you to create a personalized and unique Hello Kitty cake.
Key Features of a Two-Layer Hello Kitty Cake
- Moist and Fluffy Layers: A two-layer cake creates a balanced ratio of cake to frosting, resulting in a moist, flavorful dessert.
- Themed Decorations: The Hello Kitty design can be applied to both layers or arranged across the top layer with fun details like bows, whiskers, and the signature face.
- Customization Options: From the cake flavor to the frosting and decorations, a two-layer cake offers ample space for creativity and can be tailored to suit your event’s theme.
Ingredients and Tools You’ll Need
- Cake Base: You can use any flavor of cake you prefer for the two layers, such as vanilla, chocolate, or even strawberry. Make sure the cakes are baked evenly so they stack without tipping.
- Frosting: Buttercream, fondant, or whipped cream are ideal for decorating. A combination of frosting for the exterior and fondant for the finer details works wonderfully.
- Decorations: Edible Hello Kitty toppers, fondant for facial features, and candy decorations for added texture. You can also use colored sprinkles, pearls, or edible glitter to embellish.
- Tools: Offset spatula for frosting, piping bags for delicate details, and a serrated knife to level the cake layers. A cake stand or turntable will make the decorating process easier.
Step-by-Step Guide to Making a Two-Layer Hello Kitty Cake
- Bake the Cake Layers:
Start by preparing two identical cake layers. You can either bake them from scratch or use a cake mix for convenience. Ensure the layers are level by trimming the tops with a serrated knife once cooled. - Prepare the Frosting:
Make your frosting, ensuring it’s spreadable and smooth. If you’re using buttercream, you may want to add a little milk to reach the desired consistency. - Assemble the Cake:
Place the first layer of cake on a cake board or serving platter. Spread a generous amount of frosting on top, smoothing it out with a spatula. Place the second layer of cake on top, pressing down gently to ensure the layers stick together. - Crumb Coat:
Apply a thin layer of frosting to the entire cake to seal in any crumbs. Chill the cake in the fridge for about 30 minutes to set the crumb coat. - Decorate the Cake:
After the crumb coat has set, apply a smooth layer of frosting over the entire cake, ensuring even coverage. If you’re using fondant, roll it out and drape it over the cake. - Create the Hello Kitty Face:
Roll out white fondant and cut out Hello Kitty’s face shape. Use black fondant or buttercream to create her eyes, nose, and whiskers. Add a red fondant bow on one side of her head to complete the signature look. - Finishing Touches:
To make the cake even more eye-catching, add decorative elements like edible pearls around the base, colorful sprinkles on top, or a piped border around the edges. You could also add a fun greeting, like “Happy Birthday!” on the top layer.
Creative Variations for a Two-Layer Hello Kitty Cake
- Themed Flavors: Make each layer a different flavor, such as chocolate on the bottom and vanilla on top, to offer variety.
- Ombre Design: Use different shades of pink or your preferred color for the frosting to create a beautiful ombre effect.
- Interactive Design: Have the top layer decorated with Hello Kitty’s face, and the bottom layer can feature a Hello Kitty bow or even a “Happy Birthday” message.
- Character Embellishments: Add fondant accessories such as Hello Kitty’s friends, like My Melody, Chococat, or Keroppi, to enhance the overall theme.
Tips for Success
- Ensure Even Layers: Make sure both cake layers are the same size by using an even amount of batter for each pan or trimming the tops after baking.
- Chill Between Layers: Let the cake cool completely before decorating to prevent the frosting from melting.
- Smooth Your Frosting: To get a polished look, use a cake turntable to rotate the cake while smoothing out the frosting.
- Fondant Application: If using fondant, make sure the cake is slightly chilled so the fondant sticks without being too soft.
Why This Cake is a Hit
The Two-Layer Hello Kitty Cake is perfect for anyone looking to create a memorable and visually striking dessert. With its elevated structure and playful design, it’s sure to capture the attention of guests and delight Hello Kitty fans of all ages. Whether for a birthday or special event, the two-layer cake’s richness, texture, and detailed decoration will leave everyone talking long after the celebration is over. This cake is not just a treat, but a showstopper!
Hello Kitty Wedding Cake
A Whimsical Twist on a Classic Celebration
The Hello Kitty Wedding Cake blends the timeless elegance of a wedding cake with the playful charm of Hello Kitty, making it an ideal choice for couples who want to add a fun and personalized touch to their special day. With its unique design, this cake can be a perfect fit for a Hello Kitty-themed wedding or for couples who simply adore the character and want to infuse their wedding with some lightheartedness and nostalgia.
Why Choose a Hello Kitty Wedding Cake?
- Unique and Personalized: A Hello Kitty Wedding Cake allows you to incorporate your love for the iconic character into the most memorable day of your life.
- Fun and Playful: It’s a fantastic option for couples who want to break away from traditional wedding cakes and make a statement with something whimsical.
- A Timeless Theme: Hello Kitty’s universal appeal makes it a great choice for weddings, offering a classic and enduring charm that resonates with all ages.
Key Features of a Hello Kitty Wedding Cake
- Elegant Design: While Hello Kitty is playful, the cake can still maintain an elegant appearance with a sophisticated color palette and delicate details like lace, sugar flowers, and satin ribbons.
- Multiple Tiers: A multi-tiered cake not only gives you more space to create intricate decorations but also ensures there’s enough to serve a large number of guests.
- Iconic Details: The cake features Hello Kitty’s signature bow, facial features, and other trademark elements that can be either made from fondant or piped onto the cake.
Ingredients and Tools You’ll Need
- Cake Base: Choose a flavor that appeals to a wide range of guests, such as vanilla, chocolate, or even carrot cake. Consider offering different layers with varied flavors.
- Frosting: Smooth buttercream is ideal for creating clean, polished surfaces, while fondant can be used to cover the entire cake for a sleek look.
- Decorations: Fondant, edible glitter, sugar flowers, lace, and Hello Kitty-themed accessories. Use edible pearls or sequins for added elegance.
- Tools: Offset spatula, piping bags, fondant tools, cake stand, and dowels for tiered cakes. A cake leveler can help ensure even layers for a neat and uniform appearance.
Step-by-Step Guide to Making a Hello Kitty Wedding Cake
- Bake the Cake Layers:
Start by baking your cake layers, ensuring that you have enough for the number of tiers you want. The cake should be sturdy enough to support the weight of multiple tiers and decorations. Once cooled, level the cakes with a serrated knife. - Prepare the Frosting or Fondant:
For a sleek and smooth appearance, you can use fondant to cover the entire cake, or opt for buttercream for a softer look. If using fondant, roll it out to the correct thickness and drape it over the cakes, smoothing out any air bubbles. - Stack the Tiers:
If you’re using a multi-tiered design, stack the tiers carefully, ensuring that each layer is securely supported with dowels or cake boards between them. Make sure each tier is level before moving on to the next one. - Create the Hello Kitty Face:
Roll out white fondant and use a template or freehand technique to create Hello Kitty’s face for the top tier. Add black fondant for her eyes and whiskers, and a pink fondant bow on one side of her head. You can also use piped buttercream if you prefer a softer look. - Add Wedding Details:
To make the cake look more wedding-appropriate, you can add lace designs, edible pearls, or silver accents. Use sugar flowers to adorn the cake, and consider using a light color scheme like white, pink, or soft pastels to maintain a delicate wedding aesthetic. - Finishing Touches:
Complete the cake by adding a message like “Mr. & Mrs.” or the couple’s names on the front of the bottom tier. You can also pipe small floral details or hearts to complement the theme. Top off the cake with a decorative ribbon or bow for an added touch of elegance.
Creative Variations for a Hello Kitty Wedding Cake
- Color Palette: While classic Hello Kitty colors include white, pink, and yellow, you can customize the cake with your wedding colors to make it feel more personalized and cohesive with the rest of the wedding decor.
- Groom’s Tier: If the groom isn’t as fond of Hello Kitty, you can create a more masculine tier with complementary designs, such as simple patterns, to balance out the wedding cake’s overall look.
- Character Additions: In addition to Hello Kitty, you could incorporate other characters from the Sanrio universe, such as My Melody, Chococat, or Keroppi, to make the cake even more playful and charming.
- Mini Cake Favors: If you want to make your wedding extra special, consider making smaller, individual Hello Kitty-themed cakes or cupcakes for guests to take home as favors.
Tips for Success
- Be Mindful of Stability: A multi-tiered wedding cake needs to be stable to prevent it from toppling over. Ensure each layer is securely doweled and that the bottom tier is large and sturdy enough to hold the weight of the top layers.
- Use Fondant for Sharp Edges: If you’re looking for a smooth, sleek finish, fondant is a great choice for covering the entire cake. It will give the cake sharp edges and a polished look.
- Plan Ahead for Decorations: Wedding cakes typically require a lot of intricate detail. Start decorating ahead of time, so you’re not rushed on the big day.
- Keep the Cake Cool: Wedding cakes can be large and may need some time to assemble. Keep the cake in a cool area until it’s ready to be displayed at the wedding to prevent the frosting or fondant from melting.
Why This Cake is a Hit
The Hello Kitty Wedding Cake is a fun yet elegant way to celebrate love with a touch of whimsy. It offers a unique combination of playful and sophisticated elements that will surely delight guests of all ages. Whether you’re a die-hard Hello Kitty fan or simply looking for a charming and personalized wedding cake, this design guarantees to be a standout feature at any celebration. With its intricate details and heartwarming theme, the Hello Kitty Wedding Cake is bound to make your wedding day even more memorable.
Seasonal Hello Kitty Cakes
Celebrate the Holidays with Hello Kitty Charm
Seasonal Hello Kitty cakes bring the beloved character into the heart of every celebration throughout the year. Whether it’s a festive winter cake, a sunny springtime design, or a spooky Halloween creation, these cakes are the perfect way to infuse your seasonal festivities with a dash of Hello Kitty’s timeless appeal. Tailoring the designs to match the mood of each season allows you to enjoy a fresh, fun twist on Hello Kitty-themed cakes, making them ideal for birthdays, parties, or any special occasion.
Why Choose a Seasonal Hello Kitty Cake?
- Year-Round Fun: With a Hello Kitty cake for every season, you can celebrate holidays and special moments with a new design each time.
- Seasonal Themes: Whether it’s Christmas, Easter, Halloween, or summer, seasonal Hello Kitty cakes can reflect the mood of the time of year, creating a vibrant, festive atmosphere.
- Personalized Touch: These cakes allow you to combine Hello Kitty’s cuteness with the colors and symbols of the season, making each one unique and tailored to the celebration.
Key Features of a Seasonal Hello Kitty Cake
- Seasonal Decorations: Incorporate seasonal colors, symbols, and elements that reflect the time of year—think pumpkins and autumn leaves for fall, flowers and pastel colors for spring, snowflakes and red for winter, and bright, tropical vibes for summer.
- Hello Kitty Themed: Regardless of the season, Hello Kitty’s face or iconic bow is a constant presence, always adding a sweet, recognizable touch to the design.
- Creative Flair: Whether it’s Hello Kitty dressed in a Santa outfit or a bunny costume for Easter, the cakes can feature Hello Kitty dressed according to the season’s theme, making the design extra special.
Ingredients and Tools You’ll Need
- Cake Base: Choose a versatile cake flavor like vanilla, chocolate, or carrot cake, or pick a seasonal flavor that matches the holiday, like pumpkin spice for autumn or strawberry shortcake for summer.
- Frosting: Buttercream or fondant work great for creating smooth, clean finishes. You can also use colored frosting to match the season’s theme.
- Seasonal Decorations: For autumn, use fondant or sugar decorations like pumpkins, autumn leaves, or acorns; for winter, snowflakes or holly; for spring, flowers or Easter eggs; and for summer, sunflowers or beach elements.
- Tools: Piping bags for detailed designs, offset spatulas for smoothing frosting, cookie cutters for shaped fondant pieces, and edible glitter or sprinkles for added shine.
Step-by-Step Guide to Making a Seasonal Hello Kitty Cake
- Bake the Cake Layers:
Start by baking your chosen cake base. You can either use a simple store-bought mix or a more complex recipe depending on your preferences. Bake according to the size of the cake you want to create (single-tier or multi-tier). Let the cakes cool completely before decorating. - Prepare the Frosting or Fondant:
If you’re using buttercream, mix it to the desired consistency, and tint it with seasonal colors (e.g., pastel shades for spring or deep reds and greens for Christmas). For fondant, roll it out thinly, making sure it’s large enough to cover your cake. - Frost the Cake:
If using buttercream, apply a smooth, even layer over the cake. For fondant, cover the cake with a layer of fondant, smoothing out any bubbles or wrinkles. - Add Seasonal Details:
Now is the time to bring your seasonal theme to life! For a Halloween-themed cake, you might have Hello Kitty wearing a witch’s hat surrounded by fondant pumpkins or cobwebs. For Christmas, she might be dressed as Santa or with a snowflake-covered bow, surrounded by sugar holly. - Decorate with Hello Kitty’s Signature Touch:
Shape Hello Kitty’s face using fondant, or if you’re using buttercream, pipe the design directly onto the cake. Add her signature bow or any other characteristic feature that stands out for your seasonal theme. - Add Finishing Touches:
Decorate with edible glitter, colored sugar, or sprinkles to give the cake an extra touch of magic. Seasonal elements like mini candy canes for Christmas, mini flowers for spring, or mini pumpkins for fall can be added around the base of the cake to complete the look.
Creative Variations for a Seasonal Hello Kitty Cake
- Holiday-Specific Designs: For Halloween, you could make Hello Kitty in a cute pumpkin costume or with a spooky design, and for Christmas, she could wear a Santa outfit or be surrounded by snowflakes and holly.
- Interactive Cakes: For spring or summer, create a garden scene with Hello Kitty surrounded by fondant flowers and butterflies, allowing kids to interact with the cake’s details.
- Cupcake Version: Instead of a full-sized cake, you can make mini Hello Kitty cakes in cupcake form, each decorated to represent different aspects of the season—Halloween, Christmas, Easter, etc.
- Layered Seasonality: For a multi-layered cake, each tier can represent a different season. For example, the top layer could be a snowy winter scene, the middle a blossoming spring garden, and the bottom a sunny summer beach.
Tips for Success
- Plan Ahead for Seasonal Ingredients: Some seasonal decorations, like flowers for spring or pumpkins for fall, may be hard to find year-round. Consider preparing these in advance or opting for fondant decorations that you can make yourself.
- Match the Cake Flavor to the Season: Don’t forget to match the flavors of the cake with the season. For example, use spiced cake flavors like cinnamon or nutmeg for autumn and gingerbread for Christmas. For spring, light flavors like lemon or strawberry can complement the season’s vibe.
- Adjust Frosting to the Weather: If you’re baking in warmer months, opt for a buttercream frosting that’s firm enough to hold its shape without melting. Fondant also works well for warmer weather since it keeps its structure.
Why This Cake is a Hit
Seasonal Hello Kitty cakes combine the joy of Hello Kitty’s enduring cuteness with the festive spirit of each season, making them perfect for themed parties, holiday gatherings, or any event that celebrates the changing seasons. These cakes offer endless possibilities for creativity, ensuring that each occasion feels special and fun while still keeping the elegance of a well-crafted dessert. Whether it’s a springtime birthday or a winter wedding, the Hello Kitty cake can be dressed to match the season, making it a favorite for fans young and old.
Personalized Hello Kitty Cake
A Cake That Reflects Your Unique Style
The Personalized Hello Kitty Cake adds a special touch to any occasion by incorporating the unique preferences and personality of the person being celebrated. This type of cake goes beyond the standard Hello Kitty design by customizing it with personal details such as the individual’s name, favorite colors, hobbies, or even themed elements that reflect their interests. Whether it’s for a birthday, anniversary, or other milestone event, a personalized Hello Kitty cake adds an unforgettable element of thoughtfulness and creativity to the celebration.
Why Choose a Personalized Hello Kitty Cake?
- Custom Touch: Incorporate personalized features, such as the recipient’s name, age, favorite colors, or unique interests, making the cake truly one-of-a-kind.
- Perfect for Special Occasions: Ideal for birthdays, graduations, baby showers, or any event where the focus is on celebrating an individual.
- Versatile Design: Whether you want a cute and whimsical design or something more elegant, a personalized Hello Kitty cake can be tailored to fit any theme or atmosphere.
Key Features of a Personalized Hello Kitty Cake
- Custom Name or Message: Add the person’s name or a special message on the cake, either piped in frosting, edible letters, or fondant cutouts.
- Color Customization: Choose specific colors that reflect the recipient’s preferences or match the event’s theme—be it pastel pinks for a soft, girly look or bold blues and purples for a more modern twist.
- Unique Accents: Add personalized details such as Hello Kitty wearing the person’s favorite outfit, holding an item related to their hobbies, or featuring a favorite character alongside her.
- Interactive Features: Include elements like edible photo toppers, custom cupcake designs, or themed decorations that can be tied to the person’s story, making it more interactive and memorable.
Ingredients and Tools You’ll Need
- Cake Base: Choose the recipient’s favorite cake flavor, such as chocolate, vanilla, or a unique flavor like red velvet, lemon, or even custom flavors to match the season or celebration.
- Frosting: Use buttercream or fondant for easy customization. Buttercream can be piped into intricate designs, while fondant is perfect for creating smooth, clean finishes and detailed designs.
- Personalized Decorations: Use edible printed images, fondant cutouts, or letter molds for creating personalized messages and characters. You can also customize the design with edible glitter, colorful candies, or edible markers.
- Tools: Piping bags and tips for detailed decoration, fondant rolling pins, and letter cutters for precise lettering. A cake turntable is also helpful for decorating cakes with even precision.
Step-by-Step Guide to Making a Personalized Hello Kitty Cake
- Bake the Cake Layers:
Start by baking the cake using the recipient’s favorite flavor. You can opt for a single-layer cake or stack multiple layers for a taller, more elaborate design. Allow the cake to cool before starting the decoration process. - Prepare the Frosting or Fondant:
Prepare buttercream in the desired colors. For fondant, roll out a sheet large enough to cover the cake. If using multiple colors, you can either work with colored fondant or mix food coloring into the frosting for vibrant results. - Decorate with Personalized Details:
Using either buttercream or fondant, create Hello Kitty’s face, making sure to adjust details like her bow color to match the recipient’s favorite hues. If you’re personalizing her outfit or accessories, use colored fondant to shape little items or symbols that are important to the person. - Add the Name or Message:
Using either fondant letters or piped frosting, write the recipient’s name, age, or a special message like “Happy Birthday” or “Congratulations.” Position it prominently on the cake or along the sides in a creative arrangement. - Incorporate Themed Features:
To make the cake even more personal, add small details that reflect the recipient’s interests. For example, if they love music, create tiny fondant musical notes or instruments. If they enjoy sports, customize Hello Kitty with a little uniform or equipment related to their favorite game. - Finishing Touches:
For a polished look, use edible glitter, sprinkles, or edible beads to decorate the cake’s edges or the background. You can also add small edible photo toppers with pictures of the person or a special moment. Ensure the entire cake feels cohesive and personalized.
Creative Variations for a Personalized Hello Kitty Cake
- Photo Cake: For an extra personal touch, use an edible printed photo of the recipient along with Hello Kitty’s face, making it the focal point of the cake.
- Character Pairings: If the recipient has other favorite characters besides Hello Kitty, consider adding them alongside Hello Kitty in a unique design—perhaps Hello Kitty holding a balloon with another character or sharing a scene together.
- Themed Tiered Cake: For more elaborate celebrations, create a tiered Hello Kitty cake with each layer customized differently, featuring a personal touch like the recipient’s initials on one tier, a favorite hobby on another, and a Hello Kitty theme that ties it all together.
- Cupcake Combo: If you’re looking for a smaller, more manageable option, offer a selection of personalized Hello Kitty cupcakes with different features. Each cupcake could showcase a different letter in the recipient’s name, or different expressions of Hello Kitty based on their personality.
Tips for Success
- Know the Person’s Preferences: To make the cake truly personal, pay attention to small details about the person’s favorite colors, hobbies, or style. These details will add a unique touch to the overall design.
- Use Edible Markers or Stamps: Edible markers or stamps can be used to write on fondant or to add small details, making your design precise and professional.
- Consider the Size: Make sure to consider the number of guests when deciding on the size of the cake. If it’s a smaller gathering, cupcakes or a smaller, single-layer cake may be more appropriate.
- Coordinate with the Event: Ensure that the personalized Hello Kitty design fits the occasion—whether it’s a birthday, baby shower, or other celebration. Tailor the decorations, message, and colors to match the tone and theme of the event.
Why This Cake is a Hit
A Personalized Hello Kitty Cake stands out because it is not only visually appealing but also full of personal meaning. It combines the iconic charm of Hello Kitty with thoughtful customization, making the cake feel extra special for the individual being celebrated. This cake is perfect for any milestone or special event, allowing you to convey a personal message in the sweetest way possible.
Conclusion
Hello Kitty cakes offer endless possibilities for creative and charming designs, making them perfect for a variety of celebrations, from birthdays and weddings to themed parties and casual gatherings. With numerous styles, such as classic, two-layer, personalized, and seasonal, there’s a Hello Kitty cake for every occasion and skill level. Whether you prefer simple designs or intricate creations, the flexibility of Hello Kitty’s iconic look allows for both whimsical and elegant cakes that will delight any fan of the beloved character. We encourage you to try your favorite Hello Kitty cake design and make it your own! Don’t forget to share your beautiful creations with us, and let us know how you personalized your cake. Feel free to explore related blog posts for more cake ideas and decorating tips, and leave a comment with your thoughts or suggestions—we’d love to hear from you!